Aftermath – The Wasteland: A Design Production Timeline Blog for the Game
My post contentThe new semester has rolled in, and we’ve been tasked with an exciting yet challenging assignment to create a multiplayer game as part of the Connected Games Development module. Our group consisted of a dynamic duo of two game designers and two game programmers, and we were labeled as Group 1.
Our 8-week journey took us through a rollercoaster ride of ideation, conceptualization, iteration, and reiteration. As a newbie game designer, I kept a rough draft of all the updates and milestones that we achieved as a team.
So, buckle up, folks! In this blog, I’m going to share with you our fantastic journey of designing and developing ‘Aftermath – The Wasteland.’ We’ll take a time-lapse journey through our creative process, and I’ll spill all the beans on how this assignment expanded our thinking and creative horizons. Get ready for some gritty epic fun!
Week 1 – Setting the concept
First week of our Multiplayer Game project was a blast! We were all geared up to create the ultimate Battle Royale game, but quickly realized that it was way too mainstream. So, after scouring the depths of the internet, we stumbled upon two game masterpieces – The Forest and Tom Clancy’s Ghost Recon – and took inspiration from them to create our own twist.
As soon as we were tasked with conceptualization and identifying the core technical requirements, our programmer team came through with flying colors, churning out brilliant ideas in no time. Meanwhile, our design team was equally enthusiastic, and together we decided to go big and bold with an MMORPG! Yes, you heard it right, we were on a high, and feasibility and implementability were the least of our concerns at this point since it was just week 1.
Our pitch to the professors the following week, and we were all pumped up to present our conceptualization and technical requirements. It was time to brace ourselves for some epic feedback and insights.
Week 2 – Sowing the seed of concept
In week 2, we were struck with the realization that our MMORPG idea was more unrealistic than our dream of owning a pet dragon. Our professors had us convinced that we needed a new concept that would actually be feasible to complete in the given time frame. But being the stubborn game designers and programmers that we are, we refused to let go of the idea entirely. So, we decided to merge the concept of Co-op and Multiplayer games to create a Post Apocalyptic Survival game with a multiplayer aspect.
To add some spice, I took the initiative to polish the concept after which my design partner crafted a backstory that would make our game feel like a true wasteland survivor experience. We wanted players to feel like they were actually living in the aftermath of a catastrophe and struggling to survive. This game was going to be the perfect blend of resource management, survival tactics, and combat, with a healthy dose of community and competition.


Initial iteration of the game conceptualization and back story
This was also the week where we crowned the name of the game as: ‘Wasteland – The Aftermath’.
Week 3: Design Phase
After we had the general idea for the game, it was time to start adding the meat to the bones! We started working on the nitty-gritty details and designing the features and mechanics. One of the things we decided to focus on was crafting – we wanted players to be able to make their own weapons, tools, and shelter. Another important aspect we wanted to incorporate was base building. But as we were brainstorming, we realized there were still a lot of unanswered questions and uncertainties. So we gathered together once again for another session of brainstorming to hammer out the specifics.
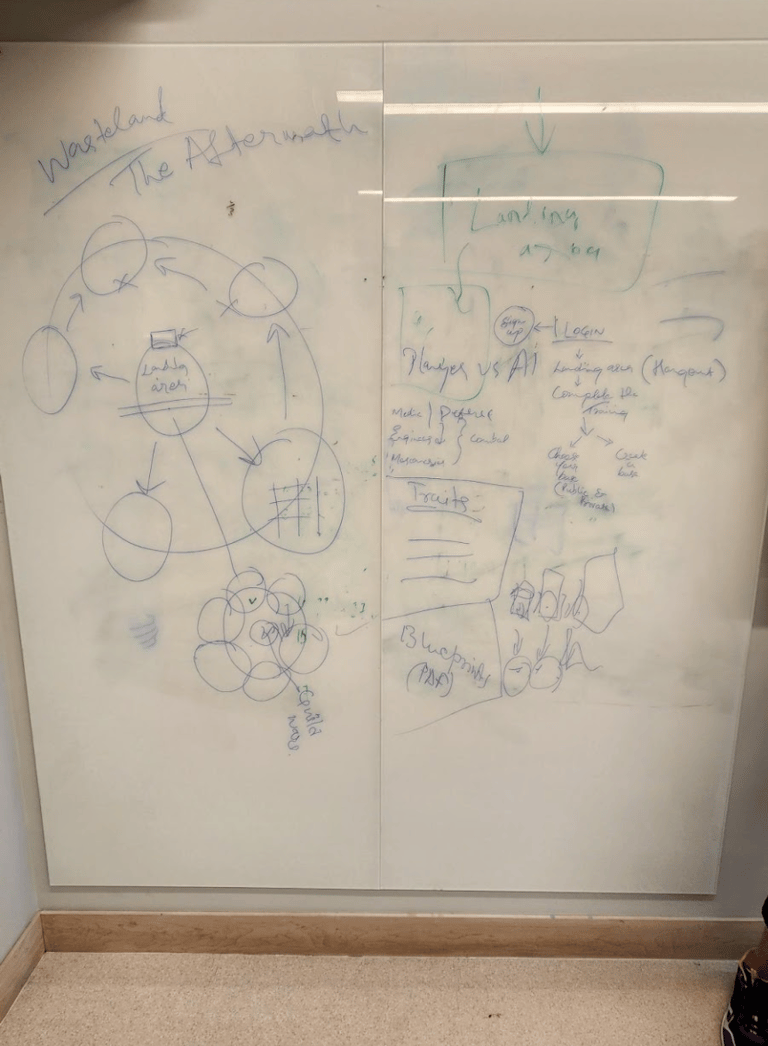
Rough Layout of the Game World
During our brainstorming session, we threw around some ideas for setting up a kickass base, choosing the perfect location, and even decided on our player characters – Mercenary, Medic, and Engineer. But then we hit a major snag – what happens if one character gets picked more than the others and the other character feels left out like a forgotten can of soda in the back of the fridge?
To avoid that sad scenario, we came up with a clever solution. Instead of creating separate characters, we made a base character with the same abilities as all three classes. But the best part? Players get to choose which trait or characteristic dominates their character (avatar).
So now, instead of being stuck with one specific class, players can perform all tasks equally (kicking butt in combat, healing, and building). But their chosen trait will give them an extra boost in their specialty – like an engineer who can build and repair faster than a medic or merc, or a merc who deals more damage than an engineer or healer.
After coming up with this genius idea, we also put together a plan for how players will jump into the game (yay! onboarding)without it feeling like a boring tutorial. We thought of making the onboarding process a part of gameplay instead rather than a separate tutorial for it. For the next week, we hashed out the details of the basic functionalities we wanted to include in the prototype, and left it to our programming team to turn those ideas into a working model in the next month and a half.
Week 5: Development Phase 1
With our game design blueprint in place, we eagerly began the development phase. And, as if by magic, it went off without a hitch (Am I saying it too early at this point?). Our programmers quickly started working on the basic game mechanics, such as character movement, animation, and weapon mechanics, while we designers focused on creating engaging in-game tasks, designing levels, and setting up a Miro board for the prototype.
We also made great use of Unity and its asset store to select the most fitting resources. This week, we even implemented multiplayer functionality, so players can join forces and create their own parties. It’s all coming together!
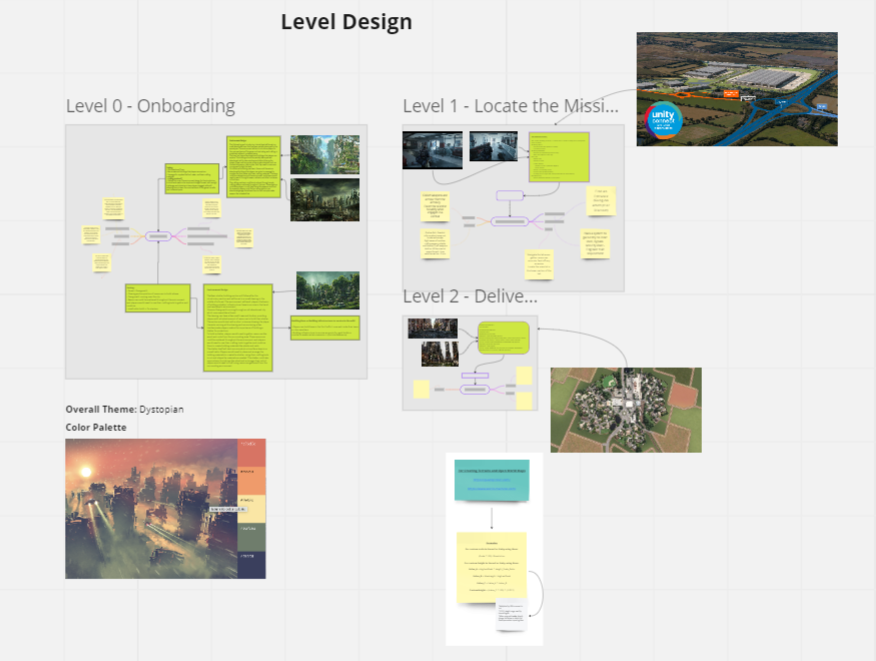
Miro Board – Level Design
Week 6: Development Phase 1
This week was an exciting one for us game designers as we finally had all the Unity assets we needed to get cracking on the level and environment designs. With the dynamic duo of two programmers and two designers on our side, we were able to delegate tasks and lend a hand wherever needed.
My design partner and I divided up the level design work evenly, each taking on one section of the map.For this I had to learn Unity from scratch for which my teammates helped me immensely in understanding it. We then flexed our creative muscles and populated our areas with the assets we had gathered. It was a beautiful symphony of game design creation!
This development phase came to an end for us designers with the submission of the UI elements. Under this, various UI elements were created such as HUD, HUD icons right from scratch. I took on the task of designing these UI assets while my design partner took the responsibility of designing the XP Distribution system and Ranking system.
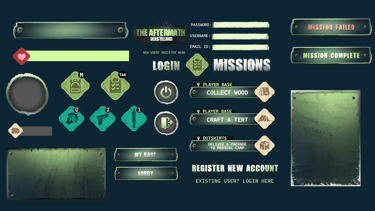
For our multiplayer game, wasteland project, I created a head-up display (HUD) that will transport you to a world of chaos and survival. With a color palette featuring shades of green, gray, brown, and black, this HUD is designed to fit perfectly into the game’s gritty aesthetic.
Firstly, I along with my game design team partner Virendra discussed the user journey for our game with our team’s game programmer’s Jignesh and Dharani. After all the team members were satisfied, I got my artistic weapons out and developed the HUD components for the game.
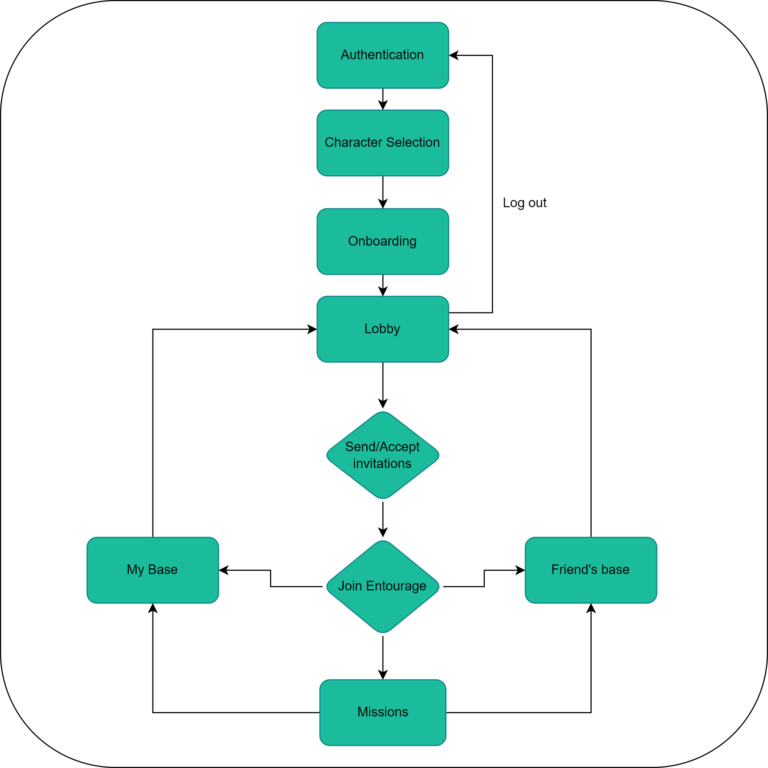

Flow chart for HUD
Let’s take a closer look at some of the components that make up the Aftermath HUD. First up, we have the health bar, which displays our character’s health level. It’s important to keep an eye on this bar, as it can mean the difference between life and death in The Wasteland. The HUD components were made on photoshop and created using a mix of digital art and vector images to get that metallic theme.
HUD Components
Color palette and fonts used
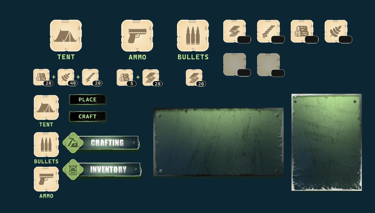
Next, we have the loading screen before the game loads, login and register page, which allows players to create and log in to their accounts. The iconography for weapons and controls is also an important aspect of the HUD, giving players quick and easy access to the tools they need to survive.

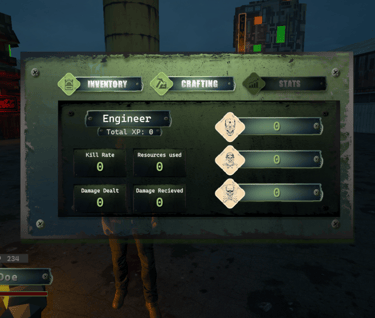
Kill chart
Once the HUD components were complete, they were handed over to our talented team of programmers who expertly implemented them into the game. The final result was visually stunning and incredibly easy to navigate.
And let’s not forget about the avatars! With a wide range of options to choose from, players can select an avatar that truly represents their style and personality.
So whether you’re a seasoned survivor or a newcomer to Aftermath, the Aftermath HUD is here to help you thrive in this dangerous world. Get ready to dive in and explore everything that Aftermath has to offer!
Week 8: Testing Phase
As we wrapped up the development phase, it was time to enter the testing phase – the crucial stage where we uncover all the bugs that our little game has been hiding. To make sure that our players won’t have to face any unexpected surprises, we conducted rigorous playtesting throughout the entire 8-week period, all while taking feedback from our brave test subjects to fine-tune the game and make it an unforgettable experience.
Submission Phase:
As the final submission date came closer than a snail crawling uphill, we kicked it into high gear and put the finishing touches on our Live-ops plan. We decided to add a monthly event called ‘Rare Hunt’ to keep our players on their toes and searching for rare items and materials throughout the game world.
All in all, our game design process was like a rollercoaster ride – it had its ups and downs, but we held on tight and created a game that combined elements of survival, combat, and multiplayer gameplay to deliver a thrilling experience for our players. We can’t wait for everyone to get their hands on our creation, and if the stars align, we’ll keep on working on this game of ours!
You can check out our gameplay video below! Enjoy.
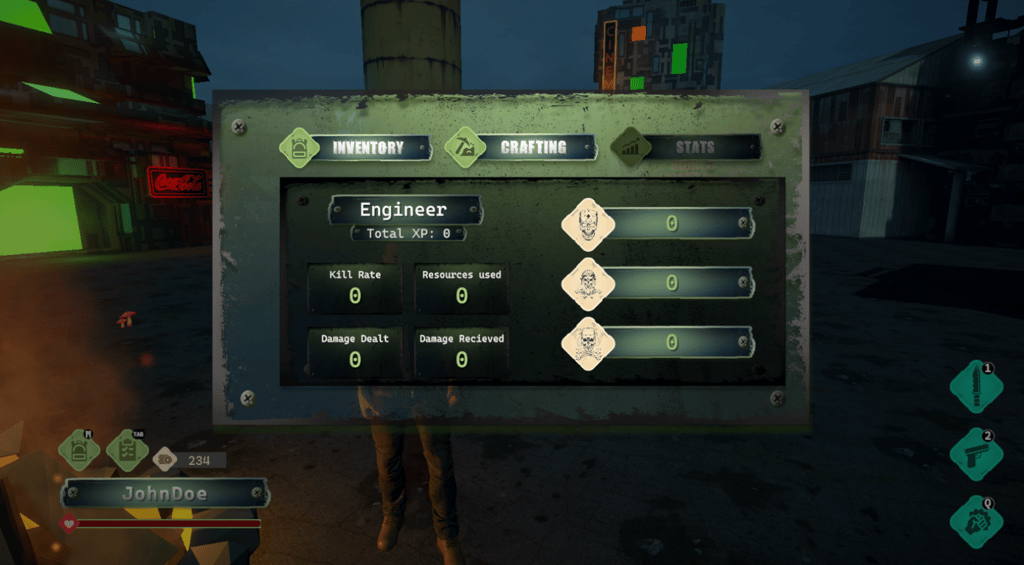
The crafting and inventory icons are also essential components of the HUD, allowing players to keep track of the items they have and what they can create.
The cursor and kill chart also blend seamlessly into the game’s aesthetic, adding to the overall experience.
